Carve a Woody with Mike - 5
As I progress with the carving I will post photos and some description
of the processes that I have used. Just left-click on the small pictures to
see a larger image.
I hope you will join me in the fun!
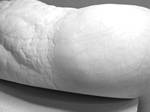 |
With the side pockets and wing coverts relieved, I layout the breast feathers and the transition area between the breast and the side..
(left-click on the picture for a larger view) |
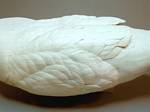 |
Once the feathers are all laid out on the breast, I turn to texturing the feathers on the side pockets and the wing coverts. First step is to define some feather shafts.
(left-click on the picture for a larger view) |
 |
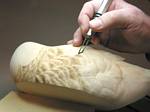
Texturing the feathers is a two step process. The first step is to texture with a ceramic stone. There are three pictures showing the steps to texturing the feathers with a stone and it may take a couple of minutes to load.
(left-click on the picture for a larger view) |
 |
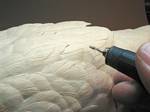
The second step in the feather texturing process uses a pyrographic pen to define the barbs of the feather running from the shaft to the outer edge. There are four pictures showing the steps to texturing the feathers with a stone and it may take a couple of minutes to load.
(left-click on the picture for a larger view) |
Back |