Carve a Woody with Mike - 4
As I progress with the carving I will post photos and some description
of the processes that I have used. Just left-click on the small pictures to
see a larger image.
I hope you will join me in the fun!
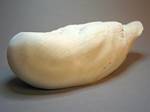 |
Time to start the feathers on the side pocket. The first step is to define some major groups of feathers.
(left-click on the picture for a larger view) |
 |
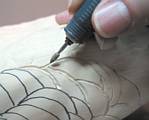
I'm not artistic enough to work without a guide so I draw the side pocket feathers on the carving. I lay them out to carefully follow the "bump" groups I defined above.
(left-click on the picture for a larger view) |
 |
Now I'm going to give some definition and shape to the feathers. Please be patient when you click on the small picture to see the larger image. There are six pictures showing the steps to defining the feathers and it may take a couple of minutes to load.
(left-click on the picture for a larger view) |
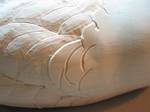 |
Final stages of forming the side pocket feathers.
(left-click on the picture for a larger view) |
 |
An overview of the side pocket feathers and the wing coverts now that they are shaped.
(left-click on the picture for a larger view) |
Back |