Side Pocket Feathers - 3
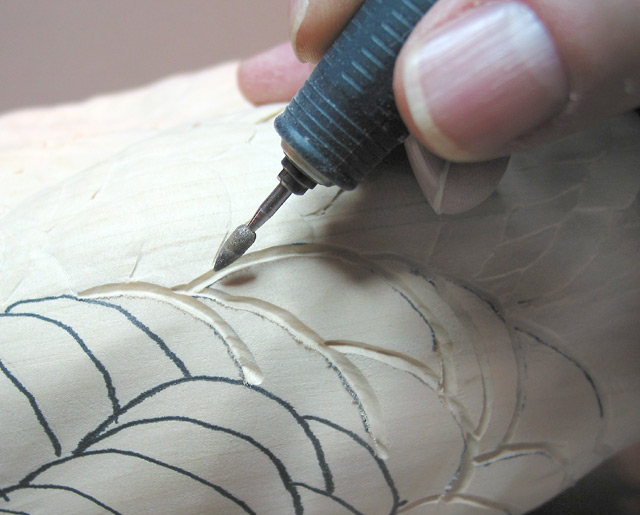
Once I am satisfied with the feather layout, I use a small ruby carver in my high-speed grinder
and outline the feathers. I do do this to give some definition to the feathers. They are too
flat if just left as drawn and then textured.
I finished outlining the feathers and am about to give each of them a shape.
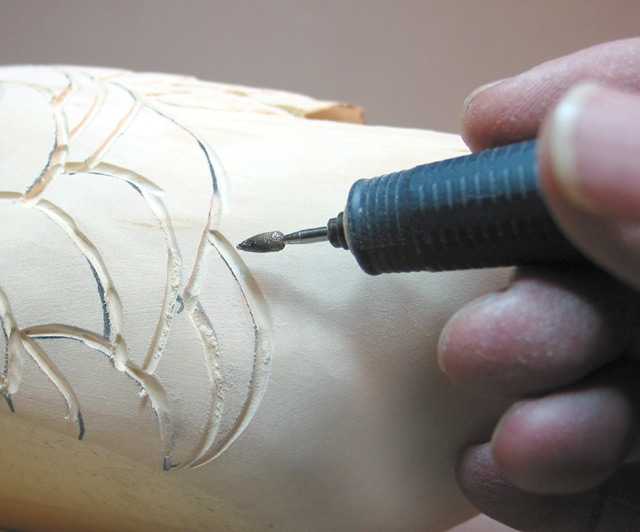
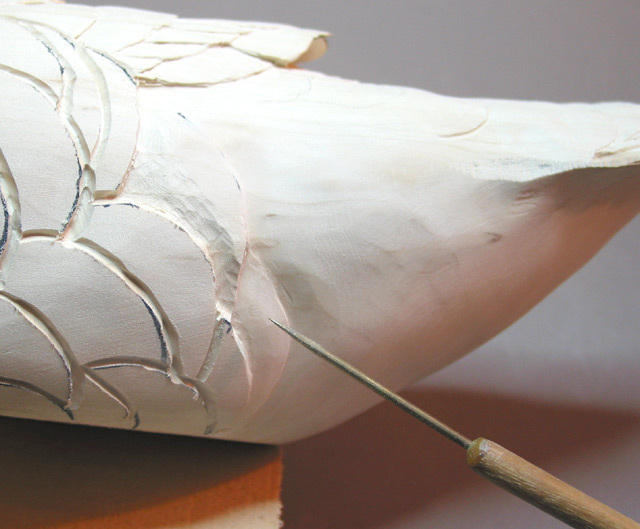
I start at the back of the pocket and work to the front. Here I'm going to use the same ruby carver
and "lower" the body behind the last side pocket feather.
I've "lowered" the rump area behind the last side pocket feather and smoothed the area
out with sand paper. The feather is now 'raised above the back ground and I can give it a
more natural rounded shape.

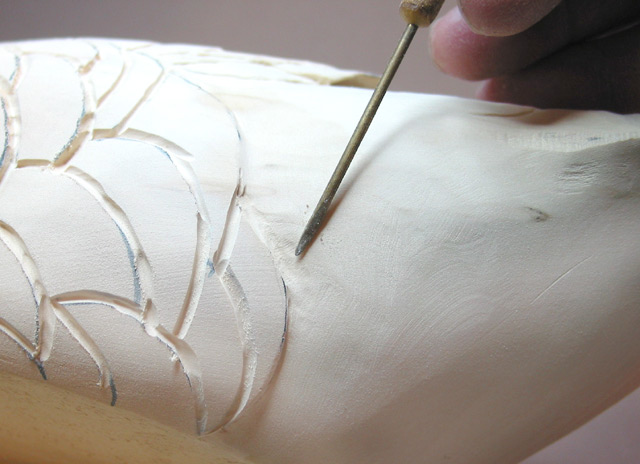
The next step is to shape the base of the feather. I grind away the wood, shaping the
feather with a high spot in the middle and the edges lowered almost to the rump level.
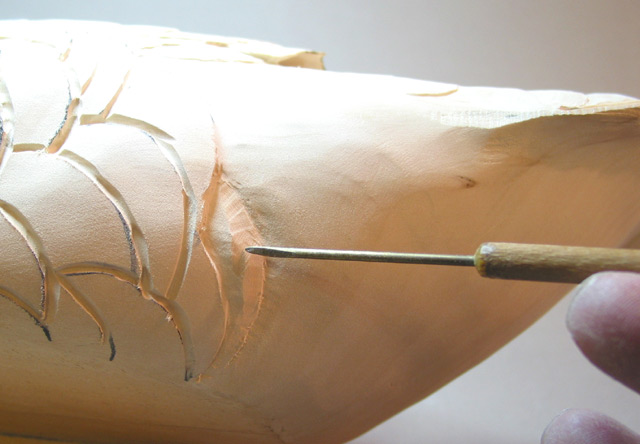
I finish the basic feather shaping by reducing the tip of the feather to the level of the rump.
This step results in a ridge running across the width of the feather (low at the base and at the tip.)
The final stage of forming the side pocket feathers is to smooth out the ridge and shape the
feather so it is round. This view shows the finished feather and I have started working on
the next one. This process continues until all the side pocket feathers have been formed.